Fort building is a rite of passage for many children, and whether it is made from a blanket or something more sophisticated like wood and twigs, a fort is perfect for hiding away, playing pretend, or simply relaxing in your own private, little world.

But how exactly can you make a fort for your children, and what materials might you need?
Table of Contents
What Is A Fort?
While it is called a fort, these do not generally resemble a military structure (unless you’re really talented), and instead tend to consist of a little hidey hole made from whatever materials and furniture you can find in the home.
Outdoor equivalents might include tents, treehouses, or other imaginative structures, but for the purpose of this article, we will focus on the indoor kind.
What Materials Do You Need?
To build the perfect indoor fort, there are some household materials you might want to get your hands on in preparation for construction.
These can include, but are not limited to:
- Blankets and bedding.
- Clothes pegs.
- Cushions and pillows.
- Cardboard boxes.
- Tents.
- Snacks.
- Flashlights.
- Toys and games.
- Sleeping bags.
There are also several types of locations around the home that make good fort building locations. These can include:
- Behind furniture – chairs, sofas, etc.
- On the bottom bunk of a bunk bed.
- Under a desk.
- In the attic.
- In the basement.
- On the porch.
- In a conservatory.
- In a closet.
Each of these has their benefits, depending on your home and the space you have free.
The Best Methods
Of course, if you do intend to construct a fort, there are various methods you can choose from to achieve the best results.
The Blanket Method
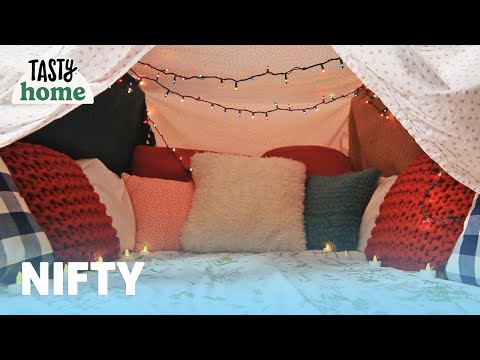
Blanket forts are certainly the most common choice for kids, and these usually involve a combination of furniture, clothes pegs, and of course, large blankets and bed sheets.
To do this successfully, you need to find a narrow corner – usually between a sofa/chair and the wall, and then drape the blanket over the top of the chair – or between two chairs – to create a tent-like structure.
If you are near a window, or a radiator, then why not clip the blanket to them with clothes pegs.
Or, if you don’t have any of those things, you could always attach the material to the wall with thumb tacks or pins – if you feel so inclined.
The Pillow Method
Of course, if you have enough pillows and cushions, you could always construct one – although this takes a little more skill, and is somewhat more precarious, depending on the firmness of the pillows used.
This works better when furniture is involved, and then you can use them as supportive struts that you can then construct the pillows around.
This works better with larger, firm, sofa cushions, which can be used to form your own igloo perfect for hatching plans, playing with toys, and whatever else your kids are into!
The Box Fort
If you are feeling a little more adventurous, and happen to have plenty of cardboard boxes, then you could always use these as the building materials for your kid’s new fort.
Depending on the size and sturdiness, these can work quite well – either as the main construction material, or simply as a framework of struts upon which to spread a blanket or patch up with pillows.
These work better in basements, attics, and other storage places, where boxes won’t be in anyone’s way, and where you can really spread out and make something impressive.
The Tent Method
Of course, if you happen to have a small pop-up tent, then you could use this as the basis for your kid’s fort.
Depending on the space that you have, this could be great in most rooms in the home, not to mention outside on the porch, or in a basement or attic.
This does feel a little bit like cheating, but sometimes you have to make do with the tools you have to hand, and if you have limited space and resources, then a small pop-up tent can make a perfectly fine fort.
What Accessories Will You Need?
Once your fort is constructed, you then need to fit it out with every gadget, tool, and gizmo you’ll need to hunker down, get cozy, and make the most of your fort.
Flashlights
Depending on whether your kid’s intention is to sleep in the fort or not, then they will need a flashlight.
This comes in handy for numerous reasons, including finding their way to the bathroom, reading their books, and finding their things in the dark.
Snacks
Any survivor needs plenty of snacks, and what better way to make your kid’s fort the perfect base than providing them with rations?
You can really go to town with this, but the best choices are foods that are in packets, and which will not spoil. Don’t forget some juice boxes to wash them down!
Sleeping Bags
Of course, if they are intending to sleep, or even just to get comfy, then they will need some sleeping bags to keep warm and snuggly.
This is fort 101, and without these it can be pretty uncomfortable for everyone involved.
Toys & Games
Long nights in the fort can be tricky, which is where toys and games come in to keep your kids entertained and happy!
Final Thoughts
And there we have it, everything you need to make a fort – perfect for your kids (or you) to play and relax for hours!
It’s true that creating a fort is something of a rite of passage for most children, and we have all spent hours creating the perfect hiding place for us and our toys to camp out in.
So if you want to make the perfect fort for your kids, then why not try some of these methods? Something tells me your kids won’t be disappointed!