There are many reasons why you may need to move your trampoline.
You may be moving into a different house, having renovations done to the backyard, or replacing the trampoline with an updated one.

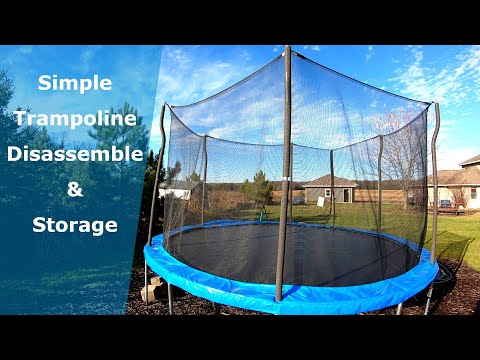
If you do need to move your trampoline, it’s best to disassemble it before you start moving it. If you don’t disassemble it first, there is more chance of you damaging the entire set.
Assembling a trampoline can look difficult, especially if you’ve never done it before. The good news is that the process isn’t as complicated as it seems.
You’ll learn how to disassemble a trampoline safely in this article, including the materials and tools you’ll need for the process, the method itself, and why assembling your trampoline is so important.
Table of Contents
Why Is It Important to Disassemble a Trampoline?
As mentioned above, it’s important to take your trampoline apart before moving it.
Trampolines are heavy and large items that are hard to move in one piece.
Transporting these items between places runs the risk of damaging the unit, whether that be the framework, nets, or springs.
Disassembling a trampoline is also important if you live in a harsher climate. Intense summer months or very icy winters can wreak havoc on your trampoline (see also ‘What Is A Trampoline’s Maximum Weight Capacity? Find Out Here‘).
These conditions can make the metal rust and the springs stiff and rigid, decreasing its lifespan as a result.
Dismantling a trampoline lets you store it in a different location during these extreme periods. This is also a recommended step in preparation for impending hurricanes or storms.
Now that you know why dismantling your trampoline is so important, we can get into the process itself.
How to Disassemble a Trampoline
Tools You Will Need
Most new trampolines come with tools included in the package. These installation tools can also be used to safely take your trampoline apart.
Before you start the disassembly process, ensure your toolbox contains the following items:
- Gloves
- 10mm radius spanner
- Power drill
- Spring tool/puller
- Screwdriver
Now let’s cover the job each tool will do during disassembly.
Gloves
Taking a trampoline apart is a manual job. There is always a chance of injuries with these jobs, particularly the hands, which can get scrapes and cuts from various tasks.
Wearing gloves will ensure your hands are suitably protected during disassembly. You’ll be more comfortable too as you know that your hands are relatively safe from harm.
It’s best to go for double-coated work gloves instead of lesser-quality ones.
Spanner and Screwdriver
A spanner and a screwdriver are both items you can use in place of each other during disassembly.
Nevertheless, having both tools close by will speed up the process, saving you time as a result.
Trampolines are built with nuts and screws that keep the unit stable while children play on it.
Both the spanner and screwdriver are specific tools that will unfasten the frame’s screws and bolts.
Power Drill
Power drills aren’t an essential tool when dismantling a trampoline, but using one can make it easier to unfasten screws, shortening the overall process as a result.
Spring Puller/Tool
A lot of people call the spring tool the spring puller, though some choose to call it a trampoline hook.
The spring tool is essential to the installation and dismantling of a trampoline. These have plastic handles with grooves built in, allowing the fingers to grip the tool firmly.
A spring tool may be sold separately or in a pair. If possible, it’s always recommended that you go with the pair instead or the single item.
It’s normally more comfortable to use a pair of spring pullers, particularly if you’ve never taken a trampoline apart before.
The spring tool’s main job is to take off springs efficiently. They can also help when you’re taking the trampoline’s anchors off later on.
Disassembling a Trampoline: Method
Disassembling your trampoline doesn’t involve any complex steps, but the steps can take a while to complete.

You’ll need a minimum of an hour to do the job, so make sure you are prepared.
Step 1: Clean the Playset
Your trampoline can start to gather dirt and debris from various places, building up on the unit as time goes on.
This residue can make it harder to disassemble the trampoline, so it’s best to clean it before you start the process.
All you need is clean water and a soft cloth, but make sure you don’t use any abrasive materials.
Step 2: Take off the Nets
Now you’ll need to take off the playset’s nets. This will be the same process, no matter what kind of trampoline you have.
Begin by taking off the tent and any parts that are obstructing your entrance to the nets.
Safety nets generally have poles attached, so you’ll have to separate the poles and nets while you remove them.
If the trampoline has these poles installed into the frame, begin by uncoupling them. You’ll most likely need a screwdriver or a power drill to do this.
Take every pole off of the unit and place them on the ground in clear view. You may also need to free any nets at the base.
Once you’ve unfastened the net, you can start to remove them from the poles. Keep any screws that were on the poles safe, as you’ll need them to put the trampoline back together.
Step 3: Remove the Padding
It’s generally easy to remove safety padding, as these cushions are simply tied onto the unit.
All you’ll have to do is untie the older knots, but make sure that you remove the safety pads after removing the safety net.
Safety padding will have knots located beneath the trampoline, which you will need to untie yourself.
You’ll need to bend down into some unnatural positions to do this, but if any knots are too difficult, you can use a screwdriver to slacken the knot.
Step 4: Take the Springs Off
Most people find this step the most difficult one in the disassembly process. You’ll need your spring tool for this job, along with a bit of strength.
Begin by examining the condition of the trampoline springs.
The process used to take a spring in good condition is different from the one you’ll need to remove a broken or worn-out spring.
Make sure that you check for any rust on the springs, as removing rusty springs also involves a different method.

If the springs are in good condition, follow these steps to safely remove them.
- Look at the spring’s hooks on the unit. The springs may hook to a D-ring or a V-ring, based on the type of trampoline that you have.
- Hook the spring puller onto the spring’s hook.
- Once the spring is hooked, pull it toward the middle of the trampoline. The spring should then unfasten from the hook on the D or V-ring.
- Use the same steps to unhook the leftover springs, but make sure that you pass over every three springs as you do so. This will evenly spread the spring force out over the leftover springs.
- You may be able to use the unhooked spring to take any leftover springs off. Just unhook the end of a single spring to take any other ones off.
Step 5: Fold the Mats
Once you have unhooked all of the springs, the trampoline’s mat and frame should be left over.
This step is simple, just fold the mat and keep it in a dry storage location.

Step 6: Dismantling the Frame
If you have ever put a trampoline frame together before, dismantling it is just like the process, just in reverse. This is a step that involves a lot of unscrewing.
You’ll be using a screwdriver a lot as you take the frame apart, but you can speed the process up by using a power drill.
It’s also a good idea to have a lubrication agent, like WD-40, to grease up any rusty or stubborn screws.
Once you’ve taken all the screws off, separate every leg from the trampoline’s exterior ring. Take caution doing this, as the legs can be very heavy and may hurt your feet if they fall on them.
Remember to work across the trampoline to evenly distribute the pressure, instead of just moving to the next post after the other.
Once you’ve taken the legs off, you will need to dismantle the exterior ring.
Separate the T-joints from the rings by twisting the outer rings, then keep each part in specific storage containers.
How to Move a Trampoline Without Disassembling It
It’s a lot easier and safer to move a trampoline after dismantling it.
However, if you’re just moving it across your yard, you may prefer to keep it all in one piece for convenience.
If you’d prefer to avoid dismantling your trampoline, there are two options you can try instead.
Use Wheels
A lot of trampolines don’t have wheels, but they are a popular accessory that you can purchase separately.
Online retailers, like Amazon, stock trampoline wheels at an affordable price.
These are available in various shapes and sizes, and shouldn’t cost more than a few dollars. All you have to do is ensure that they fit the type of trampoline that you own.
Once you’ve purchased the wheels, fasten one to each of the legs on the trampoline. Make sure that these are secure, then you can push the playset to different locations in your yard.
Doing the Job Manually
If you’re up to the task, you can attempt moving the unit with the assistance of your friends.
However, moving a whole trampoline manually isn’t convenient, especially if you need to move it to an entirely different location.
It’s best to use this method for moving the trampoline around your yard.
The Bottom Line
Disassembling a trampoline can seem like a hefty task, but it isn’t as complicated as it looks!
As long as you have the right tools and allocate yourself enough time, you’ll be able to take apart your trampoline in a few simple steps.
If you’d rather avoid disassembling your trampoline, you can install wheels on the frame for easy transport, but this is best reserved for moving the unit across your yard.
If you need to move a trampoline into a different location, it’s always best to dismantle it beforehand.